How To Paint A Ceiling Like A Pro: 9 Tips For A Smooth, Even Finish
- Nov 17, 2025
- 5 min read

Transform Your Connecticut Home with These Professional Ceiling Painting Tips
Painting your ceiling might not sound like the most exciting home improvement project, but it’s one of the most impactful—and challenging—tasks you can tackle. A freshly painted ceiling brightens a space, hides years of wear, and adds that crisp, finished look every homeowner loves. But without the right technique, what starts as a weekend refresh can quickly turn into a streaky, neck-straining mess.
Whether you live in New Haven, Fairfield, or along the Connecticut Shoreline, this guide from Rest Tech Painting breaks down everything you need to know for a professional-quality result—from prep to finish and when it’s best to call in the pros.
9 Tips to Painting A Perfect Ceiling
1. Gather the Right Tools and Prep Materials
Preparation is everything when it comes to ceiling painting. Unlike walls, gravity works against you here—so having the right setup keeps paint where it belongs: on the ceiling, not your floors.
You’ll need:
Extension pole and roller: A medium-nap roller (⅜” to ½”) gives smooth coverage on most ceilings. Attach it to a sturdy pole to avoid overreaching.
Angled sash brush: For cutting in corners and edges.
Primer or stain-blocking sealer: Especially important if your ceiling has water marks, smoke stains, or repairs.
Drop cloths or plastic sheeting: Protect floors and furniture from splatters.
Painter’s tape: To mask crown molding, trim, and fixtures.
Step ladder or scaffold: For precise edge work and safety.
Before painting, clear the room as much as possible. Cover anything that remains, tape off your trim, and clean the ceiling with a dry microfiber mop or damp sponge to remove dust and cobwebs. Dirt or grease buildup will cause patchy paint adhesion later on.

2. Choose the Right Ceiling Paint Sheen and Color
It’s tempting to grab the cheapest white paint and get started—but the type of paint and finish you choose will make all the difference.
Flat or matte finishes are the best choice for ceilings. They hide imperfections, minimize glare, and create a clean, consistent look.
Eggshell or satin finishes reflect light and are easier to clean, making them suitable for kitchens or bathrooms—but they can highlight roller marks.
Color options:
Classic whites and soft creams brighten rooms and reflect natural light beautifully.
Warm neutrals like taupe or sand bring a cozy atmosphere to shoreline cottages and living rooms.
Subtle blues or grays add depth and complement coastal Connecticut décor.
If your walls are bold, a white ceiling can balance the design. For a dramatic touch, try painting the ceiling a few shades lighter than the walls for a seamless, spacious effect.
3. Prime Your Ceiling Before You Paint
Priming might feel like an extra step, but it’s the secret to professional-looking results. A high-quality primer creates an even surface, covers old stains, and helps your topcoat adhere better.
Stain-blocking primer: Use this for ceilings with discoloration or water spots.
All-purpose primer: Great for new drywall or when changing colors.
Let the primer dry completely before applying your ceiling paint. Skipping this step often leads to uneven coverage or visible patches once the paint dries.
4. Master the Cutting-In Technique
Before you roll on the paint, use an angled sash brush to cut in around the perimeter of the ceiling, light fixtures, vents, and corners. Aim for a 2–3-inch border.
Work in manageable sections, keeping your brush strokes light and consistent. Feather the edges slightly—this prevents visible lines once you start rolling.
Pro tip: Use a high-quality brush that holds paint evenly. Cheap brushes can shed bristles and leave streaks behind.

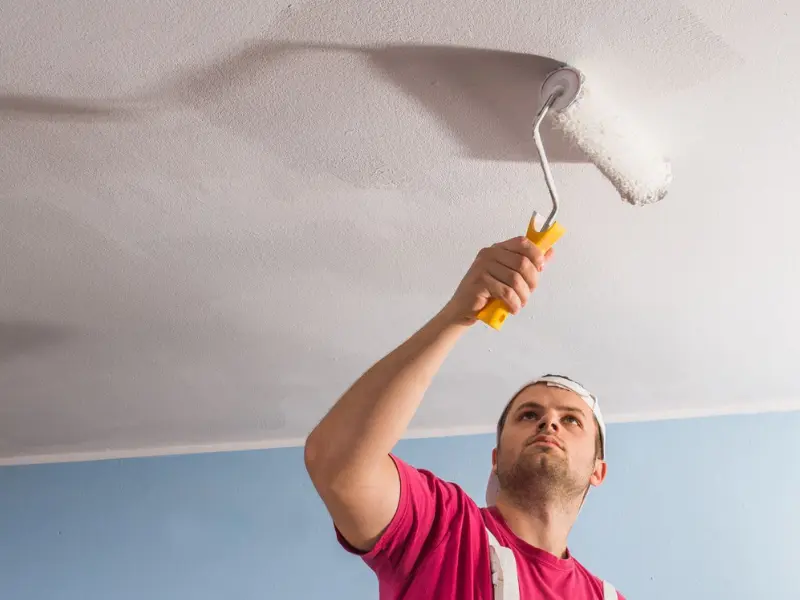
5. Apply Paint Evenly Using the Right Rolling Method
Once your edges are cut in, it’s time to roll. Load your roller evenly, but not excessively. Too much paint can drip and leave roller marks.
Start in a corner of the room and roll in straight, overlapping lines across the shortest dimension of the ceiling. Maintain a “wet edge” by overlapping slightly with the previous section while it’s still damp. This prevents lap marks and keeps the finish uniform.
Work methodically and apply two thin coats instead of one thick layer. Allow the first coat to dry completely (usually about four hours) before applying the second.
6. Common Ceiling Painting Mistakes to Avoid
Even with the best intentions, ceiling painting can go wrong fast. Here are some pitfalls to avoid:
Skipping prep work: Dust, grease, or old residue will cause peeling or patchiness.
Overloading the roller: Leads to drips, splatters, and uneven texture.
Poor lighting: Always use bright, direct lighting to spot missed areas.
Inconsistent direction: Switching directions mid-roll can create visible patterns.
Ignoring safety: Never stretch or balance on unstable ladders—use an extension pole instead.

7. How Lighting and Room Design Affect Ceiling Color
Lighting dramatically changes how ceiling colors appear. Natural daylight brings out cooler tones, while warm artificial light enhances beige or yellow undertones.
Bright, sun-filled rooms: Cooler whites or light grays prevent glare.
Dimly lit rooms: Creams and soft neutrals make the space feel warmer.
Open-concept spaces: Keeping the ceiling consistent in tone helps unify adjoining rooms.
If you’re painting in a coastal Connecticut home, consider how natural shoreline light will influence color throughout the day.
8. Save Time and Stress with Professional Painting Services
There’s no denying that painting ceilings is physically demanding work. Between climbing ladders, stretching, and controlling drips, it’s one of the toughest DIY tasks to do well.
That’s why so many homeowners across New Haven, Guilford, Branford, and Madison trust Rest Tech Painting for flawless interior results. Our experienced painters know the best techniques for even coverage, lasting durability, and minimal disruption to your home.
Why hire professional painters:
Expert surface prep and priming for smooth results
Premium, low-VOC paints for a healthier indoor environment
Clean, efficient work that protects your flooring and fixtures
Safe techniques that eliminate the need for risky ladder work
We take care of every detail—from protecting your furniture to the final cleanup—so you can simply enjoy your refreshed space.

9. The Finishing Touch: Clean Up and Inspection
Once the final coat is dry, carefully remove painter’s tape while the paint is still slightly soft to prevent peeling. Fold up drop cloths carefully to catch stray drips, and reinstall light fixtures or ceiling fans once the surface is fully cured.
Stand back and inspect the finish from multiple angles. Under different lighting, even minor streaks can show—touch up any thin spots as needed for a flawless appearance.
Refresh Your Home’s Interior with Rest Tech Painting
Your ceiling might not be the first place you look when entering a room—but it’s one of the most defining features of your home’s interior. A clean, evenly painted ceiling adds brightness, depth, and a sense of polish that transforms your entire space.
At Rest Tech Painting, we specialize in residential painting services across the Connecticut Shoreline, using quality materials and meticulous craftsmanship to deliver lasting results.
Whether you’re updating a single room or repainting your entire home, we’ll help you choose the perfect colors, finishes, and techniques to achieve the look you love.
Contact Rest Tech Painting today for an interior painting consultation—and see how professional quality and detail can elevate your Connecticut home.


